After my last kernel upgrade I tried to build the iptables mirror target that I have published the last time here. The iptables mirror target takes the packet sent to your machine and returns the same packet to the machine the packet came from. Thus, let’s say someone tries to scan your machine or tries an attack (s)he would scan his own machine or even attack his own machine.
When I tried it with kernel version 6.18, it did not build anymore with the current linux kernel. This time the struct flowi4 was changed kernel 6.18. Its member flowi4_tos has been removed. Thus I had to replace the assignment to flowi4_tos with one to the new member flowi4_dscp.
You can download the newer release for kernel version 6.18 and probably future kernels here:
The kernel module has been tested with kernel version 6.18.0-zen1. To build the module, boot the kernel you want to use the module with. Afterwards unpack the archive and run the compile.sh script to build the module. Then run the install.sh script for installing the compiled module into the /lib/modules directory for your kernel. Unfortunately the mirror target does not work with iptables version 1.6 and newer due to removal of the ipt_MIRROR extension (libipt_MIRROR.so). To use the MIRROR target one has to use iptables 1.4.21 or below.
Now you may use the mirror target in place of the REJECT or DROP target in the INPUT, FORWARD and PREROUTING chains, like this in your firewall script:
$IPTABLES -A INPUT -j MIRROR
Beware: The use of the mirror target may lead to strange results, in example if you want to connect to an iptables protected machine which uses the mirror target, you may end up connecting to the local machine without recognizing it. It also may use much bandwith. The worst case occurs if you have two machines using the module. These machines may end up playing ping pong. So you have been warned, use with caution and at your own risk. For more information see: MIRROR target.
Downloads for older kernel versions are below. Notice the version numbering 2.6.25 works for kernels up to 2.6.27. 2.6.28 also works for 2.6.29 and 2.6.30 kernels. The 2.6.13 version of the module should work up to kernel version 2.6.16.
Like I did when receiving the Cosmo Communicator, I want to share the first impressions while unboxing the brand new Astro Slide, I have received yesterday. About two and a half years ago I have backed Planet Computers Astro Slide Indiegogo campaign. Again Planet Computers has promised a device that is different from anything else, that is available for purchase. The Astro Slide is a slider class device with a fully integrated keyboard and touchscreen and full phone usability that is designed for Android, but will also be capable of running Linux or Sailfish OS. No need to go through the full specs here, everything interesting regarding these can be read on Planet Computers web page. Originally Planet Computers was planning the device in March 2021, then Covid-19 appeared… Yesterday, after a long time of waiting the parcel with the Astro Slide finally arrived. When receiving the parcel I had to pay an additional 33€ import fees.
Parcel containing the Astro Slide
Inside the parcel has been a single box.
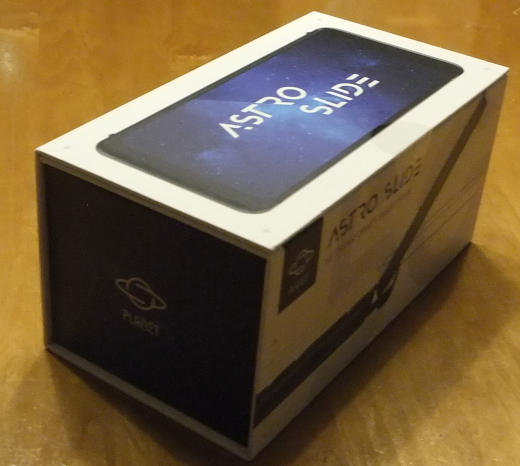
Box containing the Astro Slide
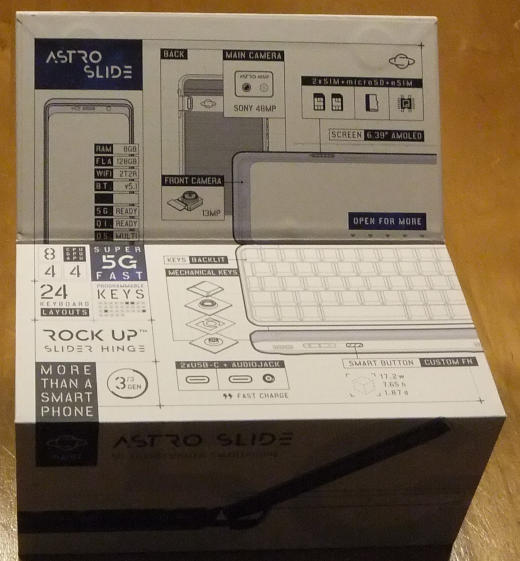
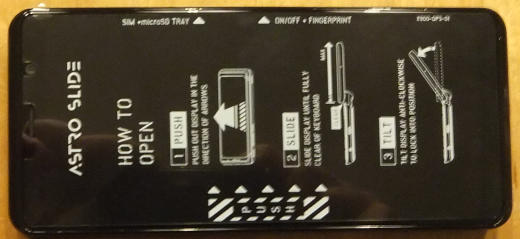
Before opening the box has to be fold out.
Fold out Astro box
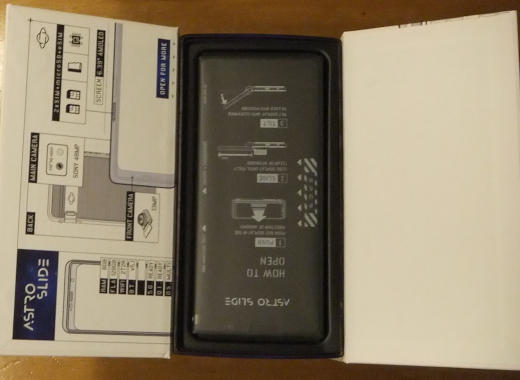
After Opening the box one can see the well packed Astro in there.
Opened Astro box
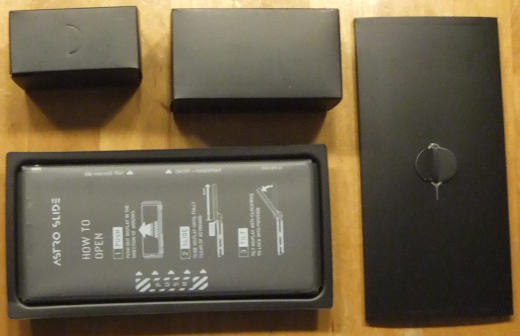
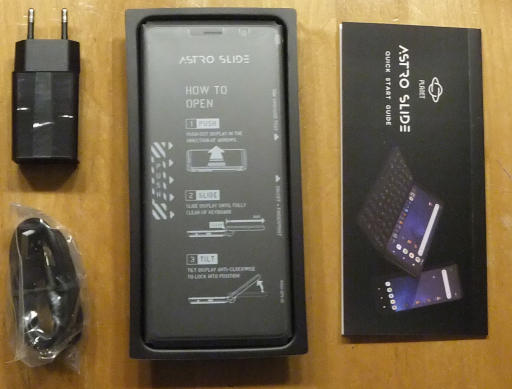
The full content of the box can be seen below. One can see the Cosmo wrapped well in foil as well as an envelope containing a quick start manual and the Sim card tool. Still in the box are two smaller boxes containing the charger and the USB cable.
Astro box content
After some further unboxing we can see charger and user manual.
Astro box content
After removing the foil we can see the Astros full beauty.
The Astro Slide
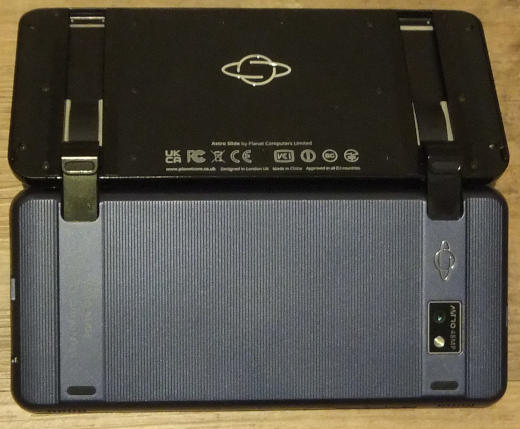
From the back side we can see camera and rubber feet.
Back side of the Astro
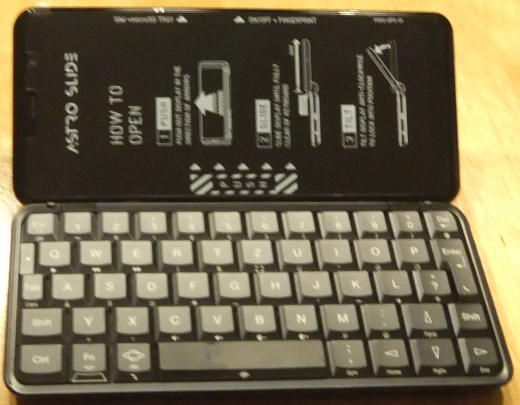
With the opened device we can see the display and the German QWERTZ keyboard. The keyboard again feels more solid as with the Cosmo.
When opened we can see the sliding mechanism from the back. The sliding mechanism is a bit clumpsy as others described before. It will take some time to get the feel for it.
Astros sliding mechansim from the back
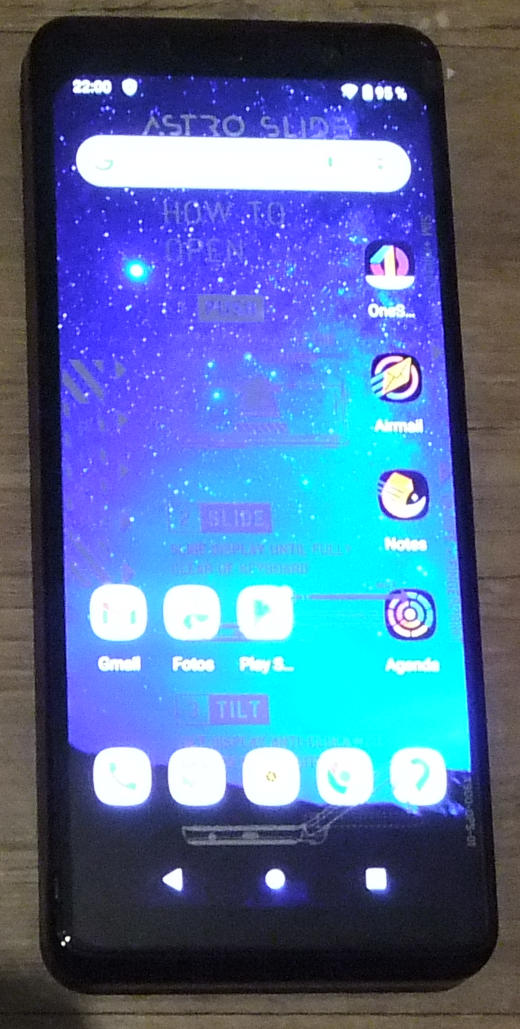
After completing the initial setup process the Astro shows the Android desktop.
Astro running Android
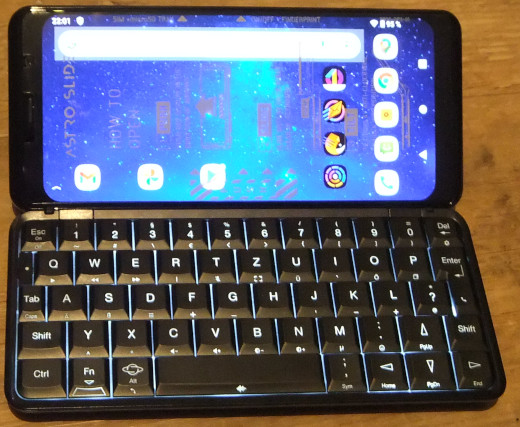
Below we can see the desktop in landscape while the keyboard is slided out and its backlit is turned on. Unfortunately the display corners are far rounder than with the Cosmo.
Slided out Astro with running Android
I am hoping you have enjoyed the photo series and some first impressions of the Cosmo. Further articles regarding testing some aspects of the device, and hopefully some solutions will follow. Stay tuned for updates.
One year ago I have posted a gentoo ebuild for the devolo dlan cockpit software in the article devolo-dlan-cockpit-5.1.6.2 with gentoo. In the meanwhile Devolo has published a newer version. The new version 5.2.0.185 feels more or less the same as the old one, but most probably some bugs have been fixed.
The main purposes of devolo-dlan-cockpit are:
Firmware upgrades for the network adapters
Monitoring the performance
Configuring the network adapters
Firmware upgrades are more or less plug and play. One has to click the Updates-Button and everything else happens automagically. Monitoring the network performance with devolo-dlan-cockpit is of major interest, since it allows one to try out different wall sockets for better performance with nearly zero effort. If one gets poor performance it can be of major impact just to use another wall socket in the same room.
Dlan-cockpit is available for most common operating systems. However, the only Linux distribution, Devolo supports right now is Ubuntu Linux. Most probably, the package will also work with Debian. Allthough these are binary packages, the application can also be used with Gentoo Linux. For this two binaries have to be executed /usr/bin/devolonetsvc, the service daemon and /opt/devolo/dlancockpit/bin/dlancockpit, the frontend application which depends on the service. Usually devolonetsvc is being started by an initrd script, but the one included in the package is not going to work with gentoo, so just start it manually as root user. If one really needs it that often, an own startup script or systemd configuration can be written. Below you can see a screenshot of the application.
Screenshot of devolo dlan-cockpit 5.2.0.185
The Gentoo way
For gentoo users here is my overlay including the updated devolo-dlan-cockpit ebuild: devolo-dlan-cockpit-5.2.0.185_overlay.tar.gz (28811 downloads ) . It also contains an adobe-air-runtime ebuild as necessary dependency. The adobe-air-runtime ebuild has been taken from steam-overlay. Download the overlay and extract it in /var/db/repos/local. Be sure to include a file local.conf in your /etc/portage/repos.conf directory with the following content:
[local]
location = /var/db/repos/local
Then emerge devolo-dlan-cockpit and configure your dlan adapters using your gentoo box.
The Resin 3D DLP printer Wanhao Duplicator 7 originally has been offered with the free slicing software Creation Workshop available for download.1 Later on Wanhao seems to have bought the software company behind Creation Workshop and have developed new version, Wanhao D7 Workshop. The original download locations for the free software vanished. Users who have bought the printer after November 2018 were able to get a free license key. Others, who bought it before or obtained a used printer, had to buy one. Fortunately a user made the binaries of the original free opensource version available for download again at dropbox.2
Creation Workshop has been developed using .Net C# and can be used with Mono with Linux. Unfortunately this version of the Software does not work with mono on Linux depending on graphics hardware. There also has been a report of Creation Workshop crashing on the Raspberry Pi.3 45 From what I can tell it works with Intel graphics boards, but crashes with NVIDIA graphics boards. When running Creation Workshop with nvidia-drivers, it shortly opens a black window and then crashes with the console output below:
X11 Error encountered:
  Error: BadMatch (invalid parameter attributes)
  Request:     151 (5)
  Resource ID: 0x840006E
  Serial:      1568
  Hwnd:        Hwnd, Mapped:False ClientWindow:0x840006E, WholeWindow:0x840006D, Zombie=False, Parent:[Hwnd, Mapped:True ClientWindow:0x8400064, WholeWindow:0x8400063, Zombie=False, Parent:[Hwnd, Mapped:True ClientWindow:0x8400062, WholeWindow:0x8400061, Zombie=False, Parent:[Hwnd, Mapped:True ClientWindow:0x8400060, WholeWindow:0x840005F, Zombie=False, Parent:[Hwnd, Mapped:True ClientWindow:0x840005E, WholeWindow:0x840005D, Zombie=False, Parent:[Hwnd, Mapped:True ClientWindow:0x840005C, WholeWindow:0x840005B, Zombie=False, Parent:[Hwnd, Mapped:True ClientWindow:0x840005A, WholeWindow:0x8400059, Zombie=False, Parent:[Hwnd, Mapped:True ClientWindow:0x8400058, WholeWindow:0x8400057, Zombie=False, Parent:[<null>]]]]]]]]
  Control:     UV_DLP_3D_Printer.GUI.Controls.ctlGL  at System.Environment.get_StackTrace () [0x00000] in <a6a5ba8fc13a4797a32a4dc4ae25c772>:0
  at System.Windows.Forms.XplatUIX11.HandleError (System.IntPtr display, System.Windows.Forms.XErrorEvent& error_event) [0x00000] in <f8f55e5d29ae400f8589d196b5502445>:0
  at OpenTK.Platform.X11.Glx.MakeCurrent (System.IntPtr , System.IntPtr , System.IntPtr ) [0x00000] in <6e87929761c543a4bfb6d5acaea62619>:0
  at OpenTK.Platform.X11.Glx.MakeCurrent (System.IntPtr display, System.IntPtr drawable, OpenTK.ContextHandle context) [0x00000] in <6e87929761c543a4bfb6d5acaea62619>:0
  at OpenTK.Platform.X11.X11GLContext.MakeCurrent (OpenTK.Platform.IWindowInfo window) [0x00000] in <6e87929761c543a4bfb6d5acaea62619>:0
  at OpenTK.Graphics.GraphicsContext.MakeCurrent (OpenTK.Platform.IWindowInfo window) [0x00000] in <6e87929761c543a4bfb6d5acaea62619>:0
  at OpenTK.GLControl.MakeCurrent () [0x00000] in <1b9440a0f8834418a8d369f909728a32>:0
  at OpenTK.GLControl.OnHandleCreated (System.EventArgs e) [0x00000] in <1b9440a0f8834418a8d369f909728a32>:0
  at System.Windows.Forms.Control.WmCreate (System.Windows.Forms.Message& m) [0x00000] in <f8f55e5d29ae400f8589d196b5502445>:0
  at System.Windows.Forms.Control.WndProc (System.Windows.Forms.Message& m) [0x00000] in <f8f55e5d29ae400f8589d196b5502445>:0
  at System.Windows.Forms.ScrollableControl.WndProc (System.Windows.Forms.Message& m) [0x00000] in <f8f55e5d29ae400f8589d196b5502445>:0
  ...
From the output there seems to be a problem with OpenTK.Graphics, which turns out to be an incompatibility of the bundled version of the OpenTK .Net wrappers libraries bundled with this version of Creation Workshop. To fix this problem one can download newer versions of the wrapper dlls, which work together with nvidia-drivers, from nuget.org.
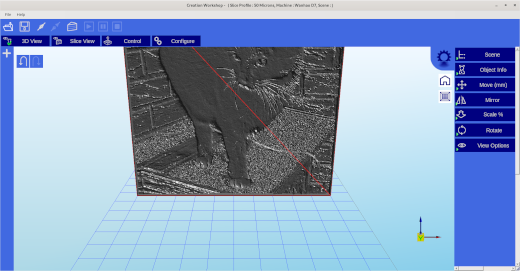
After downloading, the dlls can be extracted from the nupk files using unzip. Then replace the the files OpenTK.dll and OpenTK.GLControl.dll in the Creation Workshop directory with the newer ones from the nuget packages.
Creation Workshop-1.0.0.75 running on Linux with NVIDIA Graphics
Afterwards Creation Workshop can simply be started from the terminal:
This way Creation Workshop has been run on Gentoo Linux on X86_64 architecture and on a NVIDIA Jetsons TX2 board with ARM64 architecture. Other platforms like the Raspberry, reported to be problematic, might work as well.
Bosch’s BME680 is a very interesting component. It is a four in one sensor, which can measure temperature, humidity, pressure and air quality. Unfortunately there is no official support for using the sensor with arm64 linux. This article shows a kernel based approach to use this sensor with NVIDIA’s arm64 based Jetson boards.
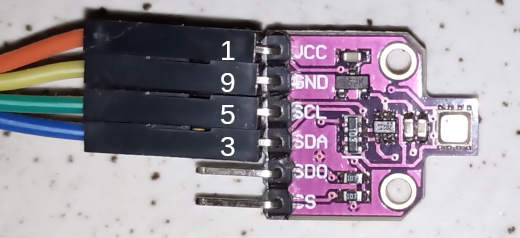
bme680 sensor breakout board which is connected to a NVIDIA Jetson TX2
Connecting the sensor First of all the sensor has to be connected to an i2c port of the Jetson board. There is no difference whether we use a TX2, Nano or Xavier board for this. The pin Layout of the Raspberry based GPIO connector (for example J12 on Xavier NX, J42 on Nano and J21 on TX2)123 is the same with all these boards. After connecting the sensor to the pins 1-9-5-3, as shown above, we can check the connection using i2detect. If we can see a device with i2c address 0x77 or 0x76 everything is connected properly.
root@jetson:/usr/src# i2cdetect -ry 1
WARNING! This program can confuse your I2C bus, cause data loss and worse!
I will probe file /dev/i2c-1 using receive byte commands.
I will probe address range 0x03-0x77.
Continue? [Y/n]
     0  1  2  3  4  5  6  7  8  9  a  b  c  d  e  f
00:          -- -- -- -- -- -- -- -- -- -- -- -- --
10: -- -- -- -- -- -- -- -- -- -- -- -- -- -- -- --
20: -- -- -- -- -- -- -- -- -- -- -- -- -- -- -- --
30: -- -- -- -- -- -- -- -- -- -- -- -- -- -- -- --
40: -- -- -- -- -- -- -- -- -- -- -- -- -- -- -- --
50: -- -- -- -- -- -- -- -- -- -- -- -- -- -- -- --
60: -- -- -- -- -- -- -- -- -- -- -- -- -- -- -- --
70: -- -- -- -- -- -- -- 77
Building the kernel modules During Google Sommer of Code 2018 Himanshu Jha has developed a kernel based driver for the bme680 sensor4. The kernel supplied by nvidia (4.9.140) does not support the BME680 sensor. Mainline kernel started supporting this sensor with version 4.19. Fortunately the required kernel module can also be built against the older NVIDIA supplied kernel. So we just have to get the kernel source of a kernel version supporting the sensor. This time we will use the most recent 4.19 kernel:
We just need to extract the drivers/iio/chemical subtree of the kernel source for building the bme680 sensors kernel module.
tar --strip-components=3 -xzf linux-4.19.116.tar.gz linux-4.19.116/drivers/iio/chemical
After extracting, we have to configure the build. To do so, prepend the following lines to the Makefile in this subtree:
CONFIG_BME680=m
CONFIG_BME680_I2C=m
Afterwards build the kernel module5 and install the binaries to the modules folder:
make -C /lib/modules/`uname -r`/build M=$PWD
make -C /lib/modules/`uname -r`/build M=$PWD modules_install
Once the kernel modules have been installed as shown above, we can load the the kernel module with modprobe bme680_i2c. This can be automated on startup by adding the module to /etc/modules-load.d/modules.conf.
Using the sensor via sysfs To use the sensor we have to register it with the kernels i2c subsystem6. This could be added to a startup script, for example /etc/rc.local.
Depending on sensor configuration the i2c address can be 0x76 or 0x77. Once the sensor is registered, the sensors readings can be acquired using the sysfs interface:
Unfortunately the kernel driver does not support the calibration of the sensor and just outputs the resistance value of the air quality sensor. So calculating CO2 equivalent or air quality from the sensors readings has to be done in userspace. Usually this calculation is being done using Bosch’s closed source BSEC library which cannot be used on arm64 architecture or within kernel context. A promising approach on self-calculating the air quality from the raw sensors readings has been shown in pimoronii forums7. According to this, the IAQ8 air quality index ranging from 0 to 500, can be calculated from the bme680 readings using the following formula:
iaq = log(gas_reading) + 0.04 * humidity_reading
For completeness, the bme680 device can be unregistered6 from the kernels i2c subsystem as follows:
Quite a while ago I have posted a gentoo ebuild for the devolo dlan cockpit software in the article devolo-dlan-cockpit-4.2.3 with gentoo. After having purchased some devolo Magic 2 PowerLan adapters to extend the existing Devolo dlan 1200 network, I have found out that the old version 4.3.3 of devolo-dlancopit does not support the new Magic 2 adapters. The Magic 2 adapters turned out to be incompatible with the dlan 1200 adapters anyway, but that is a different story. Looks like replacing the existing adapters is the next step. At least the newer version of devolo-dlan-cockpit supports both adapter types.
Devolo offers the application devolo-dlan-cockpit for download. The main purposes of devolo-dlan-cockpit are:
Firmware upgrades for the network adapters
Monitoring the performance
Configuring the network adapters
Firmware upgrades are more or less plug and play. One has to click the Updates-Button and everything else happens automagically. Monitoring the network performance with devolo-dlan-cockpit is of major interest, since it allows one to try out different wall sockets for better performance with nearly zero effort. If one gets poor performance it can be of major impact just to use another wall socket in the same room.
Screenshot of devolo dlan-cockpit 5.1.6.2
Dlan-cockpit is available for most common operating systems. However, the only Linux distribution, Devolo supports right now is Ubuntu Linux. Most probably, the package will also work with Debian. Allthough these are binary packages, the application can also be used with Gentoo Linux. For this two binaries have to be executed /usr/bin/devolonetsvc, the service daemon and /opt/devolo/dlancockpit/bin/dlancockpit, the frontend application which depends on the service. Usually devolonetsvc is being started by an initrd script, but the one included in the package is not going to work with gentoo, so just start it manually as root user. If one really needs it that often, an own startup script or systemd configuration can be written. Below you can see a screenshot of the application.
The Gentoo way
For gentoo users here is my overlay including the updated devolo-dlan-cockpit ebuild: devolo-dlan-cockpit-5.1.6.2_overlay.tar.gz (33558 downloads ) . It also contains an adobe-air-runtime ebuild as necessary dependency. The adobe-air-runtime ebuild has been taken from steam-overlay. Download the overlay and extract it in /usr/local/portage. Be sure to include the following line in your /etc/make.conf:
PORTDIR_OVERLAY=”/usr/local/portage”
Then emerge devolo-dlan-cockpit and configure your dlan adapters using your gentoo box.
After my last kernel upgrade I tried to build the iptables mirror target that I have published the last time here. The iptables mirror target takes the packet sent to your machine and returns the same packet to the machine the packet came from. Thus, let’s say someone tries to scan your machine or tries an attack he would scan his own machine or even attack his own machine.
When I tried it with kernel version 5.4, it did not build anymore with the current linux kernel. This time there has been a API change in kernel 5.0. Thus I had to replace the call to skb_make_writable() with a call to skb_ensure_writable. Furthermore a call to dst_neigh_output() had to be replaced by a call to neigh_output(). Also a small Makefile change has been necessary. Starting with kernel 5.4 the outdated SUBDIRS=$(PWD) argument gets ignored and M=$(PWD) has to be supplied instead. You can download the newer release for kernel version 5.4 and probably future kernels here:
The kernel module has been tested with kernel version 5.4.15-zen1. To build the module, boot the kernel you want to use the module with. Afterwards unpack the archive and run the compile.sh script to build the module. Then run the install.sh script for installing the compiled module into the /lib/modules directory for your kernel. Unfortunately the mirror target does not work with iptables version 1.6 and newer due to removal of the ipt_MIRROR extension (libipt_MIRROR.so). To use the MIRROR target one has to use iptables 1.4.21 or below.
Now you may use the mirror target in place of the REJECT or DROP target in the INPUT, FORWARD and PREROUTING chains, like this in your firewall script:
$IPTABLES -A INPUT -j MIRROR
Beware: The use of the mirror target may lead to strange results, in example if you want to connect to an iptables protected machine which uses the mirror target, you may end up connecting to the local machine without recognizing it. It also may use much bandwith. The worst case occurs if you have two machines using the module. These machines may end up playing ping pong. So you have been warned, use with caution and at your own risk. For more information see: MIRROR target.
Downloads for older kernel versions are below. Notice the version numbering 2.6.25 works for kernels up to 2.6.27. 2.6.28 also works for 2.6.29 and 2.6.30 kernels. The 2.6.13 version of the module should work up to kernel version 2.6.16.
 MyGNU.de


![[Valid RSS]](https://validator.w3.org/feed/images/valid-rss.png "Validate my RSS feed")

