Using CreationWorkshop on Linux with NVIDIA graphics

The Resin 3D DLP printer Wanhao Duplicator 7 originally has been offered with the free slicing software Creation Workshop available for download.1 Later on Wanhao seems to have bought the software company behind Creation Workshop and have developed new version, Wanhao D7 Workshop. The original download locations for the free software vanished. Users who have bought the printer after November 2018 were able to get a free license key. Others, who bought it before or obtained a used printer, had to buy one. Fortunately a user made the binaries of the original free opensource version available for download again at dropbox.2

Download: https://www.dropbox.com/s/ytu5yoo2ltut5a2/Creation_Workshop_D7_v1.0.075.zip?dl=0

Wanhao Duplicator D7+ 3D printer

Creation Workshop has been developed using .Net C# and can be used with Mono with Linux. Unfortunately this version of the Software does not work with mono on Linux depending on graphics hardware. There also has been a report of Creation Workshop crashing on the Raspberry Pi.3 45 From what I can tell it works with Intel graphics boards, but crashes with NVIDIA graphics boards. When running Creation Workshop with nvidia-drivers, it shortly opens a black window and then crashes with the console output below:

X11 Error encountered: 
  Error: BadMatch (invalid parameter attributes)
  Request:     151 (5)
  Resource ID: 0x840006E
  Serial:      1568
  Hwnd:        Hwnd, Mapped:False ClientWindow:0x840006E, WholeWindow:0x840006D, Zombie=False, Parent:[Hwnd, Mapped:True ClientWindow:0x8400064, WholeWindow:0x8400063, Zombie=False, Parent:[Hwnd, Mapped:True ClientWindow:0x8400062, WholeWindow:0x8400061, Zombie=False, Parent:[Hwnd, Mapped:True ClientWindow:0x8400060, WholeWindow:0x840005F, Zombie=False, Parent:[Hwnd, Mapped:True ClientWindow:0x840005E, WholeWindow:0x840005D, Zombie=False, Parent:[Hwnd, Mapped:True ClientWindow:0x840005C, WholeWindow:0x840005B, Zombie=False, Parent:[Hwnd, Mapped:True ClientWindow:0x840005A, WholeWindow:0x8400059, Zombie=False, Parent:[Hwnd, Mapped:True ClientWindow:0x8400058, WholeWindow:0x8400057, Zombie=False, Parent:[<null>]]]]]]]]
  Control:     UV_DLP_3D_Printer.GUI.Controls.ctlGL  at System.Environment.get_StackTrace () [0x00000] in <a6a5ba8fc13a4797a32a4dc4ae25c772>:0 
  at System.Windows.Forms.XplatUIX11.HandleError (System.IntPtr display, System.Windows.Forms.XErrorEvent& error_event) [0x00000] in <f8f55e5d29ae400f8589d196b5502445>:0 
  at OpenTK.Platform.X11.Glx.MakeCurrent (System.IntPtr , System.IntPtr , System.IntPtr ) [0x00000] in <6e87929761c543a4bfb6d5acaea62619>:0 
  at OpenTK.Platform.X11.Glx.MakeCurrent (System.IntPtr display, System.IntPtr drawable, OpenTK.ContextHandle context) [0x00000] in <6e87929761c543a4bfb6d5acaea62619>:0 
  at OpenTK.Platform.X11.X11GLContext.MakeCurrent (OpenTK.Platform.IWindowInfo window) [0x00000] in <6e87929761c543a4bfb6d5acaea62619>:0 
  at OpenTK.Graphics.GraphicsContext.MakeCurrent (OpenTK.Platform.IWindowInfo window) [0x00000] in <6e87929761c543a4bfb6d5acaea62619>:0 
  at OpenTK.GLControl.MakeCurrent () [0x00000] in <1b9440a0f8834418a8d369f909728a32>:0 
  at OpenTK.GLControl.OnHandleCreated (System.EventArgs e) [0x00000] in <1b9440a0f8834418a8d369f909728a32>:0 
  at System.Windows.Forms.Control.WmCreate (System.Windows.Forms.Message& m) [0x00000] in <f8f55e5d29ae400f8589d196b5502445>:0 
  at System.Windows.Forms.Control.WndProc (System.Windows.Forms.Message& m) [0x00000] in <f8f55e5d29ae400f8589d196b5502445>:0 
  at System.Windows.Forms.ScrollableControl.WndProc (System.Windows.Forms.Message& m) [0x00000] in <f8f55e5d29ae400f8589d196b5502445>:0 
  ... 

From the output there seems to be a problem with OpenTK.Graphics, which turns out to be an incompatibility of the bundled version of the OpenTK .Net wrappers libraries bundled with this version of Creation Workshop. To fix this problem one can download newer versions of the wrapper dlls, which work together with nvidia-drivers, from nuget.org.

Downloads can be found here: opentk.2.0.0.nupkg and here: opentk.glcontrol.3.1.0.nupk.

After downloading, the dlls can be extracted from the nupk files using unzip. Then replace the the files OpenTK.dll and OpenTK.GLControl.dll in the Creation Workshop directory with the newer ones from the nuget packages.

Creation Workshop-1.0.0.75 running on Linux with NVIDIA Graphics

Afterwards Creation Workshop can simply be started from the terminal:

mithrandir@galadriel ~/Creation_Workshop_D7_v1.0.075 $ mono CreationWorkshop.exe

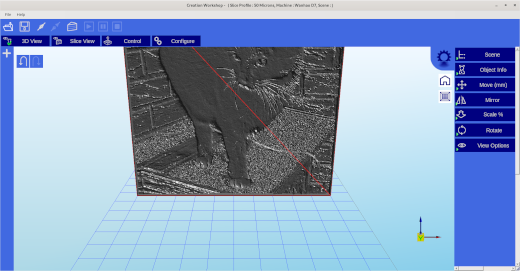
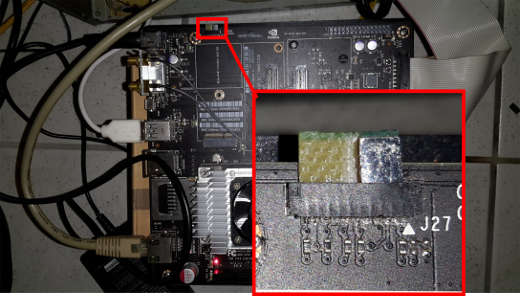
This way Creation Workshop has been run on Gentoo Linux on X86_64 architecture and on a NVIDIA Jetsons TX2 board with ARM64 architecture. Other platforms like the Raspberry, reported to be problematic, might work as well.

Jürgen

  1. theoddartisan.com: wanhao-duplicator-7-d7-v1-5-setup-tutorial/
  2. google groups: D7 Plus – Some setup information
  3. buildyourownsla.com : Creation Workshop on Linux
  4. buildyourownsla.com: CW does not work on Linux
  5. buildyourownsla.com: Problem launching CW on Ubuntu Linux 14.10

1 Star2 Stars3 Stars4 Stars5 Stars (No Ratings Yet)
Loading...

Using the BME680 sensor with nvidia jetson boards part I

Bosch’s BME680 is a very interesting component. It is a four in one sensor, which can measure temperature, humidity, pressure and air quality. Unfortunately there is no official support for using the sensor with arm64 linux. This article shows a kernel based approach to use this sensor with NVIDIA’s arm64 based Jetson boards.

bme680 sensor breakout board which is connected to a NVIDIA Jetson TX2

Connecting the sensor
First of all the sensor has to be connected to an i2c port of the Jetson board. There is no difference whether we use a TX2, Nano or Xavier board for this. The pin Layout of the Raspberry based GPIO connector (for example J12 on Xavier NX, J42 on Nano and J21 on TX2)123 is the same with all these boards. After connecting the sensor to the pins 1-9-5-3, as shown above, we can check the connection using i2detect. If we can see a device with i2c address 0x77 or 0x76 everything is connected properly.

root@jetson:/usr/src# i2cdetect -ry 1
WARNING! This program can confuse your I2C bus, cause data loss and worse!
I will probe file /dev/i2c-1 using receive byte commands.
I will probe address range 0x03-0x77.
Continue? [Y/n] 
     0  1  2  3  4  5  6  7  8  9  a  b  c  d  e  f
00:          -- -- -- -- -- -- -- -- -- -- -- -- -- 
10: -- -- -- -- -- -- -- -- -- -- -- -- -- -- -- -- 
20: -- -- -- -- -- -- -- -- -- -- -- -- -- -- -- -- 
30: -- -- -- -- -- -- -- -- -- -- -- -- -- -- -- -- 
40: -- -- -- -- -- -- -- -- -- -- -- -- -- -- -- -- 
50: -- -- -- -- -- -- -- -- -- -- -- -- -- -- -- -- 
60: -- -- -- -- -- -- -- -- -- -- -- -- -- -- -- -- 
70: -- -- -- -- -- -- -- 77                       

Building the kernel modules
During Google Sommer of Code 2018 Himanshu Jha has developed a kernel based driver for the bme680 sensor4. The kernel supplied by nvidia (4.9.140) does not support the BME680 sensor. Mainline kernel started supporting this sensor with version 4.19. Fortunately the required kernel module can also be built against the older NVIDIA supplied kernel. So we just have to get the kernel source of a kernel version supporting the sensor. This time we will use the most recent 4.19 kernel:

wget http://www.kernel.org/pub/linux/kernel/v4.x/linux-4.19.116.tar.gz

We just need to extract the drivers/iio/chemical subtree of the kernel source for building the bme680 sensors kernel module.

tar --strip-components=3 -xzf linux-4.19.116.tar.gz linux-4.19.116/drivers/iio/chemical

After extracting, we have to configure the build. To do so, prepend the following lines to the Makefile in this subtree:

CONFIG_BME680=m
CONFIG_BME680_I2C=m

Afterwards build the kernel module5 and install the binaries to the modules folder:

make -C /lib/modules/`uname -r`/build M=$PWD
make -C /lib/modules/`uname -r`/build M=$PWD modules_install

Once the kernel modules have been installed as shown above, we can load the the kernel module with modprobe bme680_i2c. This can be automated on startup by adding the module to /etc/modules-load.d/modules.conf.

Using the sensor via sysfs
To use the sensor we have to register it with the kernels i2c subsystem6. This could be added to a startup script, for example /etc/rc.local.

echo bme680 0x77 > /sys/bus/i2c/devices/i2c-1/new_device

Depending on sensor configuration the i2c address can be 0x76 or 0x77. Once the sensor is registered, the sensors readings can be acquired using the sysfs interface:

grep ^ /dev/null /sys/bus/i2c/devices/i2c-1/1-0077/iio_device/*input*
/sys/bus/i2c/devices/i2c-1/1-0077/iio_device/in_humidityrelative_input:45.503000000
/sys/bus/i2c/devices/i2c-1/1-0077/iio_device/in_pressure_input:1005.830000000
/sys/bus/i2c/devices/i2c-1/1-0077/iio_device/in_resistance_input:60726
/sys/bus/i2c/devices/i2c-1/1-0077/iio_device/in_temp_input:25100

Unfortunately the kernel driver does not support the calibration of the sensor and just outputs the resistance value of the air quality sensor. So calculating CO2 equivalent or air quality from the sensors readings has to be done in userspace. Usually this calculation is being done using Bosch’s closed source BSEC library which cannot be used on arm64 architecture or within kernel context. A promising approach on self-calculating the air quality from the raw sensors readings has been shown in pimoronii forums7. According to this, the IAQ8 air quality index ranging from 0 to 500, can be calculated from the bme680 readings using the following formula:

iaq = log(gas_reading) + 0.04 * humidity_reading

For completeness, the bme680 device can be unregistered6 from the kernels i2c subsystem as follows:

echo 0x77 > /sys/bus/i2c/devices/i2c-1/delete_device

Jürgen

References:
1. jetsonhacks.com: jetson-tx2 pinout
2. jetsonhacks.com: jetson-nano pinout
3. jetsonhacks.com: jetson-xavier-nx pinout
4. himanshujha199640.wordpress.com: bme680 driver
5. kernel.org: external modules build
6. erlerobotics.gitbooks.io: i2c kernel devices
7. pimoronii forums: calculation air quality from bme680 readings
8. wikipedia.org: Air quality index

1 Star2 Stars3 Stars4 Stars5 Stars (No Ratings Yet)
Loading...

Using the auto power on feature with the NVIDIA Jetson TX2 development kit

There has been a discussion about enabling the auto power on feature of the Jetson TX2 development kit on devtalk.nvidia.com. The solutions discussed there involved using a additional micro controller or soldering directly on the quite expensive board which is not desired by quite some users. This article will show a fairly simple and quite safe method to use the auto power on feature without additional circuitry or soldering directly on the board.

According to the Developer Kit Carrier Board Specification the auto power on feature can be enabled by shorting the CHARGR_PRSNT pin (pin 1) of the charge Charge Control Receptacle (J27) to ground (pin 5). This is fairly hard to achieve without having the appropriate connector or soldering the board itself. Since the pins 2-4 also are input pins it is safe to short all these pins (1-4)  to ground. This can easily be achieved by using a small piece of a copper plated circuit board matching the receptacles dimensions.

The piece of circuit board has to be cut and grinded to proper dimensions. A board of approximately 6mm x 8mm x1 mm size is fine. Afterwards the copper plating has to be grinded off in the area that can get contact with any other pin than the five mentioned pins. It is advisable to check this with a Multimeter while moving the board left and right in the receptable before attaching power. If you damage your board due to this procedure, you are the only one responsible. The resulting board is being shown below.

The circuit board.

The completed circuit board.

This board turned out to be a bit to thin to ensure contact, thus a bit of soldering tin has been applied to the copper plating to ensure the contact between the pins. The tiny board can now be inserted into the Charge Control Receptacle

Jetson TX2 with auto-power-on

Jetson TX2 Development board with applied board for auto-power-on

With the crafted piece of circuit board inserted into the Charge Control Receptacle the Jetson TX2 now boots directly after applying power. This has been tested with two different development boardw. For the older board (Revision B04, SATA port facing up) it worked, but it did not work for the newer (Revision C02, SATA port facing to the side) one. So your mileage might vary.

Jürgen

References:
1 NVIDIA development forums
2 JetsonTX1 TX2 Developer Kit Carrier Board Specification p. 31
3 how-to-find-carrier-board-version

1 Star2 Stars3 Stars4 Stars5 Stars (No Ratings Yet)
Loading...

nvidia-drivers-295.17 solve black screen problem

Using nvidia linux drivers from version 270.X to 275.X with some graphics boards, in example the Quadro FX 350M which is built into the Dell Precision M65 notebook,  resulted in a black screen or window for OpenGL applications. Even glxgears did only output a black window. The problem has been discussed on forums.opensuse.org. A downgrade to a lower driver version, in example the version 260.X drivers is not applicable anymore, since these drivers do dot build against a recent linux-3 kernel. A upgrade to newer drivers also was not possible, since driver versions from 285.X to 295.10 did not work at all for this graphics board. Recently version 295.17 of nvidias beta driver has become available, which solves this issue. Download links are available on nvnews.net.

For gentoo users I have modified the nvidia-drivers  ebuild for the 295.17 driver. You can download my modified overlay, [download#83] and extract it in /usr/local/portage. Be sure to include the following line in your /etc/make.conf:

PORTDIR_OVERLAY=”/usr/local/portage”

Afterwards you may emerge nvdidia-drivers-295.17.

Jürgen


1 Star2 Stars3 Stars4 Stars5 Stars (No Ratings Yet)
Loading...

Overlay Problems with Xine

Starting xine with an overlay enabled X-server on nvidia graphics boards can lead  to the problem that the xine window appears shortly and then disappears. The following error message can be found in the console when trying to play a dvd:

Dies ist xine (X11 gui) – Ein freier Video-Player v0.99.6.
(c) 2000-2007 Das xine Team.
libdvdread: Using libdvdcss version 1.2.10 for DVD access

libdvdread: Attempting to retrieve all CSS keys
libdvdread: This can take a _long_ time, please be patient

libdvdread: Get key for /VIDEO_TS/VTS_01_1.VOB at 0x00000141
libdvdread: Elapsed time 0
libdvdread: Found 1 VTS’s
libdvdread: Elapsed time 0
No accelerated IMDCT transform found
X Error of failed request:  BadMatch (invalid parameter attributes)
Major opcode of failed request:  150 (RENDER)
Minor opcode of failed request:  4 (RenderCreatePicture)
Serial number of failed request:  2155
Current serial number in output stream:  2165

Removing the  “Overlay” Option from the xorg.conf and restarting the X-server fixes this problem. Yo may also include the line

Option         “Overlay” “off”

into your screen section or device section of your xorg.conf.


1 Star2 Stars3 Stars4 Stars5 Stars (No Ratings Yet)
Loading...

stereoscopic mplayer working again part 2

One year ago I provided a patch for mplayer which included support for quad-buffered stereo, enabling mplayer to display stereoscopic movies. In the meanwhile mplayer-1.0_rc4_p20101114 arrived in portage. As before with the original patch from Stuart Levy, my one does not work anymore due to some changes in mplayers gl2 driver. So I had to modify the patch again to work again with newer mplayer versions. You may download the updated patch from here:

[download#54]

The patch should work at least with nvidia quadro boards, probably with some others. It can be used with CRT and generic shutter glasses or HMDs like the Vusix VR920. Some stereoscopic sample movies for trying it out can be found on www.3d.wep.dk.

The Gentoo way

For Gentoo users I again modified the mplayer ebuild from portage to include the patch. The modified ebuild is available here:

[download#53]

The older ebuild and patch are still available on mygnu.de.

To use the ebuild it just copy it to /usr/local/portage/media-video/mplayer and copy the the patch to the “/usr/local/portage/media-video/mplayer/files” directory. You probably have to create these directories. Then run

ebuild /usr/local/portage/media-video/mplayer/mplayer-1.0_rc4_p20101114-r1.ebuild digest

Be sure to include the following line in your /etc/make.conf.

PORTDIR_OVERLAY=”/usr/local/portage”

Then just re-emerge mplayer.

Now start mplayer with -vo gl2:stereo and enjoy the experience in the 3rd dimension again.

Jürgen

1 Star2 Stars3 Stars4 Stars5 Stars (No Ratings Yet)
Loading...

SIV 1.1 released

I am proud to present a new version of SIV, the stereoscopic image viewer for Linux I published on MyGNU.de. It should be compilable also on MacOS and Windows, but I have never tested this. SIV is  capable of displaying JPS stereo images and MPO stereo images in different stereo modes. It is tested in fullscreen/windowed mode with anaglyphic and quad buffered stereo mode. Different output devices I tested were my Vuzix VR920 and relevator shutter glasses  on Nvidia Quadro FX 350M and FX 3700.

siv-1.1_screenshot

siv-1.1 the stereoscopic image viewer

Key Features

  • support for side by side JPS stereo images
  • support for MPO stereo images (used by Fujifilm Finepix Real 3D cameras)
  • many display modes, including quad buffered stereo
  • headtracking support for the Vuzix VR920 HMD (driver available on mygnu.de)
  • black-white and sepia filter
  • controls for gamma, brightness, contrast and parallax
  • on screen display

Basic usage
You may supply one or multiple .jps or .mpo files at the command line.  I.e.  siv *.jps will display all JPS files in the current folder. Once the first image of the list is being displayed you may use CURSOR_UP/DOWN or the mouse wheel to select a different image for being displayed. You can enable/disable the slideshow mode by pressing the [Enter] key. When displaying an image the filename of the image is displayed in the lower left corner for a few seconds. Using the number keys one may select different ways to zoom/navigate in the image. In VR920 mode or normal trackball mode use the right mouse button together with mouse movements to zoom the image. You can use the middle mouse button together with movements to pan the image. While displaying an image you may alter gamma, brightness, contrast and parallax for the best viewing experience. Some images may look better in black-white or sepia mode. By pressing the [t] key you may toggle these filters. The filters and controls use shaders on the GPU, so if you experience problems with these options you may disable them with the –disable-shaders commandline switch. At present the shader code is only tested on Nvidia hardware. If you have tested it on Intel/ATI please leave a comment.

Important keybindings are:

+/- increase/decrease parallax
HOME/END display first/last image
UP/DOWN display next/previous image
SHIFT+UP/DOWN jump 10 images forward/backward
F1/F2 decrease/increase brightness
F3/F4 decrease/increase contrast
F5/F6 decrease/increase gamma
F5/F6 decrease/increase slideshow delay
t toggle filter (normal/bw/sepia)
[Enter] toggle slideshow on/off
h Help

Press h to get the full list of keybindings.

Headtracking
If you want to try out the VR920 headtracking, enable the headtracking support with the “–vr920” option. You may want to specify the distance to the image with the “-d” option. Values between 0.25 and 0.5 seem to have a nice effect when using the headtracking. When headtracking is active you may press [z] to set the zero view so that with your current head position you will see the center of the image. If you want to manipulate the view manually press the left or mittle mouse button as described above and move the mouse. The “-m” and “-p” options allow to set IP-address and port for the connection to the headtracking driver.

Commandline Usage

siv [options] stereofile(s)

Options:
–CullDrawThreadPerContext                 Select CullDrawThreadPerContext
threading model for viewer.
–CullThreadPerCameraDrawThreadPerContext  Select
CullThreadPerCameraDrawThreadPerCo-
ntext threading model for viewer.
–DrawThreadPerContext                     Select DrawThreadPerContext
threading model for viewer.
–SingleThreaded                           Select SingleThreaded threading
model for viewer.
–accum-rgb                                Request a rgb accumulator buffer
visual
–accum-rgba                               Request a rgb accumulator buffer
visual
–cc                                       Request use of compile contexts and
threads
–clear-color <color>                      Set the background color of the
viewer in the form “r,g,b[,a]”.
–disable-shaders                          disable shaders for unsupported
graphics boards
–display <type>                           MONITOR | POWERWALL |
REALITY_CENTER |
HEAD_MOUNTED_DISPLAY
–filter=[bw|sepia]                        enable filter on startup
–rgba                                     Request a RGBA color buffer visual
–samples <num>                            Request a multisample visual
–screen <num>                             Set the screen to use when multiple
screens are present.
–serialize-draw <mode>                    OFF | ON – set the serialization of
draw dispatch
–stencil                                  Request a stencil buffer visual
–stereo                                   Use default stereo mode which is
QUAD_BUFFER if not overriden by
environmental variable
–stereo <mode>                            ANAGLYPHIC | QUAD_BUFFER |
HORIZONTAL_SPLIT | VERTICAL_SPLIT |
LEFT_EYE | RIGHT_EYE |
HORIZONTAL_INTERLACE |
VERTICAL_INTERLACE | CHECKERBOARD |
ON | OFF
–vr920                                    enable headtracking support for the
vuzix vr920 hmd
–window <x y w h>                         Set the position (x,y) and size
(w,h) of the viewer window.
-O <option_string>                         Provide an option string to
reader/writers used to load
databases
-d                                         distance (values between 0.0 and
1.0 are senseful)
-e <extension>                             Load the plugin associated with
handling files with specified
extension
-h or –help                               Display this information
-l <library>                               Load the plugin
-m                                         non default multicast ip
-p                                         non default multicast port
-s                                         start in slideshow mode
-t                                         delay for slideshow mode, defaults
to 15 sec

You may notice that most of the options come from osgViewer, which is the base class for the viewer. This gives the advantage, that one can use the “normal” osgViewer controls such as flying around the scene. Try to press [f] for toggling fullscreen mode or press [s] for toggling the onscreen stats (fps, etc.) display.

Download      

I decided to publish the viewer under the creative common noncommercial license. Make sure you have the OpenSceneGraph library installed before trying to compile or run the viewer. You may download the full source (Eclipse Project) from here: SIV-1.1 source (2062 downloads ) or an x86_64 binary from here: SIV-1.1 x86_64 binary (2165 downloads ) . More binary formats may be available in the future. Fore the x86_64 binary you’ll need OpenSceneGraph-2.8.2.
Binaries of the OpenSceneGraph library for most linux distributions can be downloaded from www.openscenegraph.org.  On gentoo one can just emerge openscenegraph.

Building from source
For building from source unpack the zip and cd to siv/Release and run make.

Possible Problems
As default SIV starts in fullscreen quad buffered stereo mode. Thus if your graphics hardware does not support this mode, the viewer will exit with the following error:

Error: Not able to create requested visual.
GraphicsWindow has not been created successfully.
Viewer::realize() – failed to set up any windows

In this case try anaglyphic mode or the apropiate 3D mode for your hardware (see the –stereo option). For instructions on how to get the xserver to work in stereoscopic mode see: Vuzix VR920 with Linux and active 3D stereo

History
SIV-1.1
-support for the new MPO file format
-black-white and sepia filter
-controls for gamma, brightness, contrast and parallax
-improved OSD
-manual controls in vr920 headtracking mode

SIV-1.0
-slideshow mode
-vr920 headtracking

SIV – first version
-initial realease with support for jps files, quad buffered stereo and various other display modes

Footnote
If you like the viewer, feel free to link to www.mygnu.de. To request commercial licenses contact us at info(at)mygnu.de. Well, if you just want to support our work on MyGNU.de use the donate button 😉

have fun, enjoy the 3rd dimension and have a merry Christmas

Jürgen

1 Star2 Stars3 Stars4 Stars5 Stars (1 votes, average: 5.00 out of 5)
Loading...

siteinfo

Translator